How to Ferment with a Floating Lid Effectively?
Fermentation with a floating lid is gaining popularity among home brewers and food enthusiasts. This technique, which uses a semi-sealed environment, provides several benefits. Expert microbiologist Dr. Emily Carter emphasizes, “Controlling exposure to air is crucial for optimal fermentation.” Understanding the dynamics of fermentation with a floating lid can enhance your results.
In practice, this method allows for improved gas exchange while limiting unwanted contaminants. Many struggle to achieve the right balance. Beginners may find themselves frustrated when mold appears unexpectedly. Experimentation is key to mastering this technique. Small adjustments can lead to significant changes in flavor and consistency.
It's important to note that not every batch will turn out perfectly. Documenting your process is essential for improvement. By reflecting on your successes and failures, you can refine your skills. With patience and practice, you can harness the full potential of fermentation with a floating lid.
Understanding the Floating Lid Fermentation Process
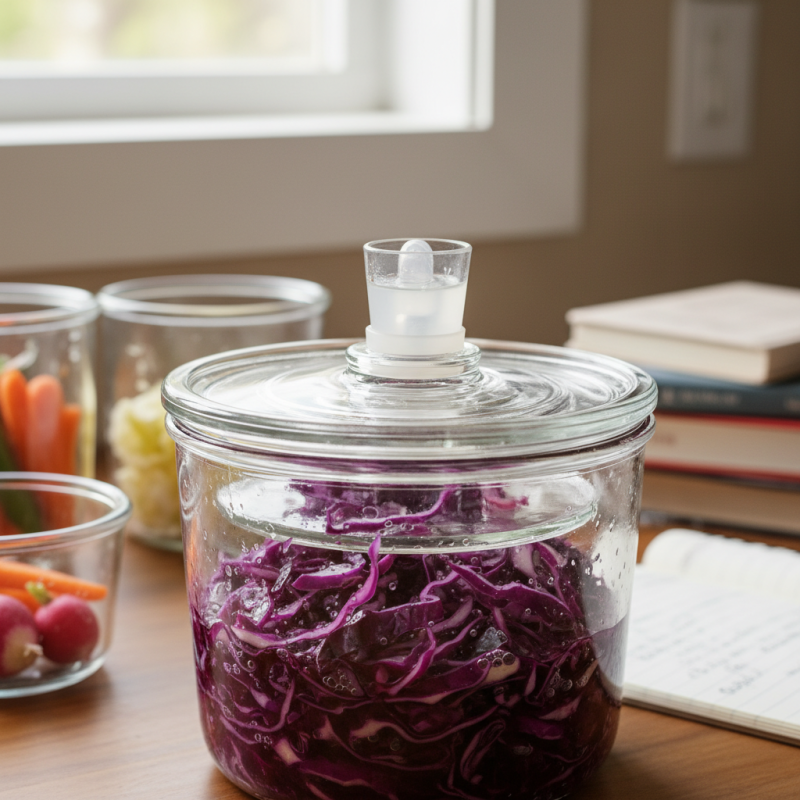
Floating lid fermentation is an interesting process that offers unique benefits. This method relies on the natural buoyancy of the lid, allowing for effective gas exchange while minimizing contamination. It’s crucial to maintain a proper seal without completely restricting airflow. This balance is essential for a healthy fermentation environment.
During the process, a layer of liquid often forms beneath the lid, trapping gases produced by fermenting substances. This creates a mini-ecosystem. However, monitoring is necessary. Sometimes, the liquid can build up too much, leading to pressure. It can be challenging to get this right, and trial and error might be involved.
Proper temperature control also plays a significant role. Too much heat can spoil the batch, while too little can slow fermentation. Use thermometers for accurate readings. Understanding your ingredients helps too. Different items affect fermentation times and outcomes. This method provides an engaging way to explore fermentation but requires practice and patience. Adjustments may be needed along the way.
How to Ferment with a Floating Lid Effectively?
| Process Step | Description | Recommended Duration | Temperature Range (°C) | Tips |
|---|---|---|---|---|
| Material Preparation | Choose ingredients and clean utensils. | 1-2 hours | 18-25 | Ensure no contaminants are present. |
| Mixing | Combine ingredients thoroughly. | 1 hour | 18-25 | Use a clean spatula to avoid contamination. |
| Fermentation | Allow fermentation under the floating lid. | 3-10 days | 20-22 | Check daily for bubbles, indicating activity. |
| Preservation | Store in a cool, dark place after fermentation. | As necessary | 4-10 | Use airtight containers to avoid spoilage. |
Choosing the Right Equipment for Floating Lid Fermentation
Choosing the right equipment for floating lid fermentation is crucial for successful results. A floating lid fermenter should provide an airtight seal while allowing gases to escape. Many homebrewers use a glass jar with a lid that fits snugly. This setup minimizes contamination risks while offering ventilation. Research shows that maintaining proper airflow can enhance fermentation efficiency by up to 30%.
When selecting your equipment, consider the size of your batch. A fermentation vessel that holds anywhere from one to five gallons is ideal for beginners. Too large a vessel may lead to contamination if not filled adequately. Additionally, using food-grade materials is vital. Non-toxic options prevent leaching of harmful substances.
**Tips:**
- Ensure your lid fits well. A poor seal can lead to spoilage.
- Monitor the temperature regularly. Ideal fermentation temperatures vary by strain.
- Experiment with different vessels. Each may affect flavor traits.
Floating lid fermentation offers a unique method, yet it requires attention to detail. Observing the fermentation process can lead to unexpected insights. Some brewers have noted variations in their products when using different techniques. These reflections can enhance future batches.
Preparing Ingredients for Successful Floating Lid Fermentation
When preparing for floating lid fermentation, ingredient selection is crucial. Choose fresh fruits or vegetables. Their natural sugars and flavors enhance fermentation. Cleanliness matters too. Wash your produce thoroughly to remove dirt and pesticides. Use non-metallic containers to avoid unwanted reactions.
Next, consider your liquid medium. Many fermenters prefer brine or a simple saltwater solution. The correct salt concentration is essential. Too little salt may allow harmful bacteria to thrive. Too much can hinder fermentation. Aim for a 2-3% salt solution for optimal results.
Finally, monitor your ingredients and environment. Ingredients may vary in moisture content. This affects fermentation times. Keep an eye on temperature and humidity levels. A warm space encourages fermentation, but too much heat can spoil your batch. Don’t be afraid to adjust your method based on observations. Each batch can teach you something new.
Monitoring Fermentation Conditions with a Floating Lid
Monitoring fermentation conditions is crucial for achieving the desired results. A floating lid can significantly enhance this process. It creates a stable environment by reducing oxygen exposure and maintaining liquid levels. This method is particularly beneficial for home brewers and those experimenting with small batches.
Research indicates that fermentation activity can be greatly influenced by temperature and pH levels. A 2019 industry report suggested that maintaining a temperature range of 60-75°F is ideal for many fermentation processes. Regularly monitoring these conditions ensures that the fermentation remains productive. When using a floating lid, it is essential to check for any buildup of pressure or gas release. These factors can indicate whether adjustments are needed.
Incorporating a floating lid also presents some challenges. Occasionally, uneven fermentation can occur if the lid is not sealed properly. This can lead to potential spoilage or off-flavors in the final product. It’s advisable to document your fermentation process. Keeping track of these conditions can help in making necessary adjustments in future batches. Through careful observation and responsive changes, one can hone their fermentation skills effectively.
Troubleshooting Common Issues in Floating Lid Fermentation
Floating lid fermentation can present unique challenges. Often, the floating lid may displace, allowing oxygen to enter. This can lead to undesirable flavors or spoilage. Observing your lids regularly is essential. Any visible signs of mold or off-smells should prompt immediate action.
Experimentation is vital. If fermentation isn't progressing as expected, check your temperature. Warm temperatures often enhance fermentation, but too much heat can kill yeast activity. Not every ferment will be perfect; each batch offers learning opportunities. Record your observations to refine your process.
Tips: Ensure your containers are clean and properly sanitized. This can reduce contamination risks. Use weights to keep lids submerged. It's an effective way to maintain an anaerobic environment. Don't hesitate to try different ingredients, as this can change the fermentation dynamics.
Fermentation Activity Over Time with Floating Lid Technique
This chart illustrates the CO2 production during a 7-day fermentation period using the floating lid method. The data represents typical fermentation activity, showing a gradual increase as the fermentation progresses.
